Sunday, August 26, 2007

Tutorial: Fabric Softener Technique

Between Splitcoast Stampers and subscribers to this blog, I was asked a lot of questions about the technique that I used in my last post. Since I was unaware of a tutorial in existence, I figured I'd make another card and take some photos along the way for my first "tutorial" on my blog. It's a pretty simple technique, but I figured a few pictures would help in the description.

Supplies you'll need:

A used Fabric Softener Sheet

Scissors

A stamped image

Adhesive


Step 1: Trim the Fabric Softener sheet to be slightly larger than your stamped image (about a 1/4 inch on each side).


Step 2: Place image upside down on fabric softener and apply adhesive to the edges of the paper.


Step 3: Fold the fabric softener over the edges of the paper onto adhesive. Trim excess off corners so that they aren't too bulky.


Step 4: Apply lots of adhesive to the frame for your stamped image. Stay away from edges that will be visible. It's easier in this case to apply the adhesive to the frame than to apply the adhesive to the back side of the stamped image since the adhesive is hard to roll onto the fabric softener sheet.


Step 5: Attach stamped image to frame.


Then all you have to do is add your stamped image to your card. The fabric softener adds a soft, textured look to your project.


Here's a close-up of the focal point of the card, which makes it a little bit easier to see the fabric softener sheet texture. I hope this tutorial helps clarify how I made the projects in my last posting. Below you'll find some more details about this card.

Card Recipe:

Stamps: Looks Like Spring, Aida Cloth background, Short & Sweet (thank you)

Paper: White, Ruby Red, Groovy Guava, Chocolate Chip, Blush Blossom

Inks: Blush Blossom, Ruby Red, Chocolate Chip

Accessories: Flower and half pearl from Pretties kit, fabric softener sheet, Narrow white organdy ribbon, copper cord, corner rounder

Notes: The brown flower was created by sponging a white flower with chocolate chip ink. The stamped flower was created by inking the rubber in blush blossom and then applying Ruby Red ink to the outer portions of the petals (on the rubber) using a sponge before stamping on paper.

Monday, August 20, 2007

Fabric Softener Technique?


I created these 3 cards using the sketch from Beate's Fresh & Fun Weekend Challenge. I've been wanting to try this fabric softener technique on a card for a really long time since I saw it done on a Regional Conference swap. The technique is pretty simple, just cover your image with your used fabric softener sheet and attach the edges on the back side. You're left with a fuzzy focal image that both looks and feels soft!

For this first card I was determined to use the new "In Color" Groovy Guava, because I haven't used it yet. I was happy to discover this color combination using Blush Blossom, Ruby Red, and Chocolate Chip. I think they go nicely together. For some reason this Guava color is more challenging for me to find colors to coordinate. I guess I just need to play more. Anyway, other than the fabric softener technique this card is fairly straight forward.


Here's the recipe:
Stamps: Short & Sweet, Year After Year, Paisely Backround, Aida Cloth Background
Paper:Groovy Guava, Blush Blossom, Chocolate Chip, White, Ruby Red
Inks: Ruby Red, Chocolate Chip, Blush Blossom, and Blush Blossom Craft
Accessories: Copper Cord, Copper Brads, Photo Corner Punch, Pretties flower (inked with Blush Blossom ink), dimensionals, Fabric Softener Sheet

The second card uses this same Fabric Softener technique, but with some different colors, papers, and stamps. Here's the recipe:
Stamps: Close as a Memory, Short & Sweet, Fine Lace Background
Papers: Brocade Blue, Bashful Blue Textured, Certainly Celery, Old Olive, Certainly Celery Prints DS, White

Inks: Brocade Blue, Old Olive

Accessories: Stitched Olive Ribbon (May Arts), Bronze brads, Fabric Softener Sheet


And this last card I made because I haven't used my Cuttle bug in a while. Same layout, but no fabric softener. The giraffe white piece has a purple edge that I created with "Direct to Paper" using my lilac ink pad.
Stamps: Wild about You, Canvas Background
Papers: Lovely Lilac, Almost Amethyst, Flowers for You DS Paper, White
Inks: So Saffron, Lovely Lilac
Accessories: Lavendar Polka dotted ribbon (May Arts), Cuttlebug die, Saffron brad, Word Window Punch
Love this layout, I got a lot of use out of it! ThanksBeate!

Friday, August 17, 2007

Check out this Amazing deal!


A few days ago Stampin' Up! announced an exciting new promotion, and I just now realized that some of my blog readers might not be demonstrators yet! If this is the case, please take note of this fantastic opportunity.

If you've ever considered becoming a Stampin' Up! Demonstrator, NOW is the perfect time to do it! From now until September 30, you will receive a FREE color family of Classic Ink Pads (12 ink pads, a $57.95 value) with your Starter Kit purchase! Stampin' Up! offered this two years ago and I had several new demonstrators take advantage of this opportunity to get a jump start on having all the ink pad colors. Most demonstrators join as "Hobby Demonstrators" meaning that they want a discount on products and all the perks that come along with being in the Stampin' Up! family. Some eventually try to make Stampin' Up! a money-making business, others continue to support their hobby at a discount and build their collection of stamps without doing any of the "business" stuff. You decide what is right for you! Here's some more details:


  • YOU customize your Starter Kit .... YOU choose the stamp sets, YOU choose the ink pads, YOU choose the cardstock!

  • The Starter Kit has $355 worth of products for ONLY $199! (Then add on the 12 ink pads for free)

  • You don't have to pay for shipping your Starter Kit (an extra savings of over $20)

  • YOU get a 20% discount each time you order!

  • YOU get a 30% discount on your first order over $150 within the first 45 days!*

  • YOU KEEP 20% instantly from all orders!

  • You earn BONUSES for sales over $400 a month!

  • There is NO minimum order due until Dec. 31 to remain active.

  • The quarterly minimum is $300 .... YOUR personal orders count toward that total!

  • If you place an order of over $150 for yourself, you get to keep the hostess benefits!

  • IF you don't meet the quarterly requirement, it's not a big deal. Eventually you just won't be a demonstrator anymore and there's no penalty whatsoever.

If you don't already have a demonstrator and you'd like to take advantage of this fantastic offer, contact me today! belangers@nycap.rr.com


My Scrapbooking Approach

There are lots of different approaches to scrapbooking, I probably scrapbook more than a lot of people and I often worry that beginning scrapbookers might get overwhelmed if they think that they should be scrapbooking as much as I do. Anyway, I think it's interesting to see what people choose to scrapbook, what projects they make, for whom, and why.


My approach has evolved over the years. When I first started, I began a series of albums that I call "Family Albums." This is where I put all my favorite pictures from our lives, and I usually order things chronologically. I call these the "family albums", because they belong to all of us, and I consider these albums to be picture books about our life as a family.

After my son was born, I decided to make an album for him, about him...something that I will likely give to him when he graduates college, or gets married or something like that (when I can trust him to take care of it!). I wanted this album to remain a "single" album, so I knew that I would have to really try hard to narrow down the photos. So I decided to make several layouts of my son's first year, but then after that be super concise and have one 2-page layout for each year of his life. So far this has worked for me, though it is hard to choose which pictures to include in this very constrained layout. And as each of my other 2 girls were born, I've done the same for them, and someday I will give them each their keepsake album.

So most of the time I am making layouts for my Family Albums, but once a year I'll pick up each of the kids' albums and assemble one layout. This is the latest spread that I made for Avery's Album, for the year 2006. On the lower left of the first page, I put a little picture of each of his classmates and teachers (I covered them up for this since I don't really have permission to be putting their photos on the web). I get even more sentimental when I work on these albums because I can see how much has changed over the course of 1 year as I choose the pictures. And knowing that this is going to be a future gift fills me with joy as I assemble the pages.
Recipe


Stamps: Big Deal Numbers
Papers: Creative License Simply Scrappin' Kit (hostess), Wild Wasabi
Inks: Brocade Blue Craft
Accessories: Stickers from Kit, Chipboard Heart, Wild Wasabi Double Stitched Ribbon

Summer Scrapbooking

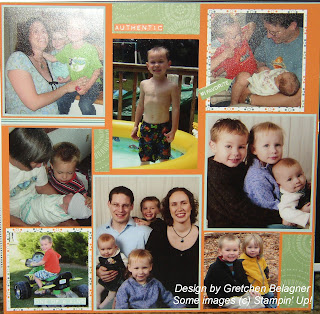
I love scrapbooking Spring and Summer Photos. I guess I just love the brighter colors the flowery papers. I'm actually more caught up on my scrapbooking than I've been in a long time. The fact that these pictures are even on pages is a testiment to that.
For this layout I compiled some photos from a couple of play dates that we've had at the local parks earlier this summer.

Here's the recipe:
Stamps: Short & Sweet (little flowers), Best Friends Alphabet, Unfrogettable (dragonfly)
Paper: Certainly Celery, Purely Pomegranate, Bashful Blue, So Saffron, Cutie Pie DS Paper
Ink: Rose Red, Black, Certainly Celery, White Gel Pen
Accessories: Photo Corner Punch, Scallop Punch, Purely Pomegranate Double Stitched Ribbon

Tuesday, August 14, 2007

Double Doodle Challenges

I felt like doing some challenges tonight so I tried Splitcoast's Color Challenge for today (CC127, Blue Bayou, Sahara Sand, and Chocolate Chip), and I combined this with Beate's Fresh & Fun weekend challenge which is due tomorrow.
I love it when I can create a whole project using just one stamp set. This time I pulled out a set that I got at last year's Regional Conference, "Double Line Doodles." I haven't used this set much, but I just love the long paisley stamp. It's hard to tell but I adhered the scalloped "I just love you" piece with dimensionals to help it "pop out" a bit, and the circles around the bayou piece are doodled by hand with a chocolate chip marker. Here's the recipe:


Stamps: Double Line Doodles
Inks: Chocolate Chip, Not Quite Navy
Papers: Sahara Sand, Chocolate Chip, Blue Bayou
Accessories: Double Stitched Bayou Ribbon, Scallop Punch, 1.25 inch circle punch, brown brad


I felt like making just one more card tonight before calling it quits, so here's what I came up with:

I guess I was in the "doodling" mood tonight because I used another doodle style set and did more doodling by hand arond the bottom of the focal image. Here's the recipe:

Stamps: Doodle This, Short & Sweet
Inks: Chocolate Chip, Not Quite Navy
Papers: Sahara Sand, Chocolate Chip, Blue Bayou
Accessories: Double Stitched Bayou Ribbon, brown brad

Sunday, August 12, 2007

Friday Night Stamping

This Friday I hosted a small card class...I just felt like making a bunch of cards and it was fun to make them with some company. We made an assortment of 5 pretty cards, most using lots of bright summer colors. Most were inspired by samples in the Fall/Winter Collection Catalog, I keep finding more and more cool ideas!
This seemed to be one of the favorites for the evening. It could be used as a thank you card or a baby card. The base of the card was Wild Wasabi, and the floweres and greeting were stamped with Garden Green ink using the "Short & Sweet" stamp set. I then layered a rectangle of Garden Green and on top of that som Bashful Blue textured card stock. The elephant was stamped on Whisper White with Bashful Blue ink and I masked his trunk before stamping the flower which I inked using my Pumpkin Pie and Garden Green markers. The elephant piece was framed with some Wild Wasabi, and then I folded some Orang Grosgrain and Stitched Wild Wasabi ribbons and adhered them to the back. I attached this whole piece to the card using dimensionals.

These card classes are fun, I think my next one is going to be in the fall and we'll be making Holiday cards.

Thank you Cindy!

Cindy Vernon sent me this cool RAK as a thank you for the blog candy that she won a little while ago. She's got a cool blog too, you can check it out at http://www.cindyvernon.blogspot.com/. It looks like she gives out lots of Blog Candy, so don't miss out!

Thanks Cindy, it's been a while since I've received a RAK, you made my day!

Thursday, August 9, 2007

The Chipboard Queen

I have to share with you this beautiful desk set that my friend Mary Jane made recently. She uploaded lots of pictures of this to Splitcoast (see links below). She says that this is her first attempt with Chipboard....you wouldn't know that by all the beautiful ways she's used it in this project. She told me that this was something she donated for a raffle, this makes a fantastic gift!

To see more pictures of the various pieces in this desk set follow the links below. Thanks so much Mary Jane for sharing!! If you'd like to see more of Mary Jane's Gallery, her Splitcoast name is MJSTAMPS.

Gift Box
Journal
Date Book
Paper Clip Book Mark
Post-it-note holder